Ukulele Player's Guide
- Repair Gallery
|
|
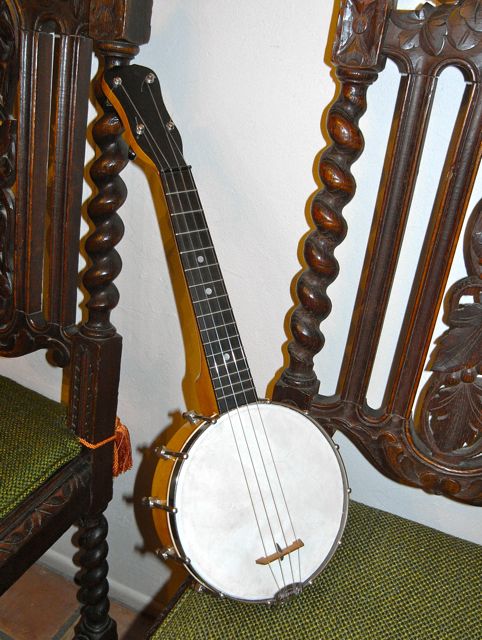
I recently decided to replace the head or vellum on the above Dixie banjo uke. (Banjo ukuleles are also called banjoleles.) I was able to obtain a new vellum made of goatskin inexpensively from ukuleleworld .com. Jimmy Young of Amarillo, who plays violin with the Bob Wills Texas Playboys, put it on for me. (I later replaced the goatskin vellum with one made of natural calfskin which improved the sound.) You can find Jimmy Young at Longcor Music in Amarillo. If you decide to replace the vellum yourself, look at the pictures below and read the directions at themusicroom-online.co.uk/advise.php. This operation greatly improved the sound of the uke. You can hear me playing "Twelfth Street Rag," a song in the Ukulele Guide Songbook with this Dixie banjo ukulele on the "Music" section of this website. A lot of hard-to-find ukulele banjo parts including inexpensive chrome-plated hooks and lugs to replace the rusty ones on the old ukes ( 2 1/16" long and in sets of 7 with the bolts that attach to the banjo uke) can be found at bezdez store on ebay.com.
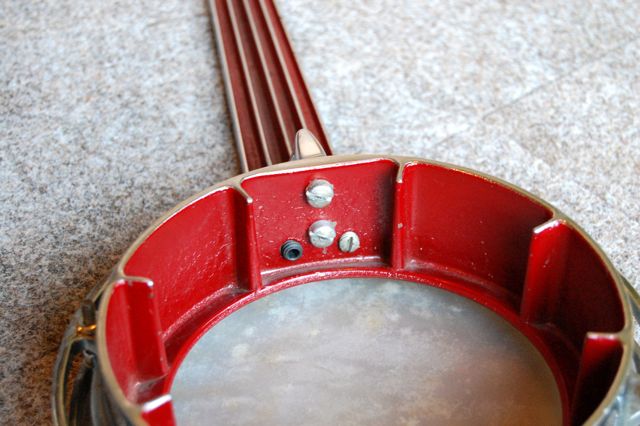
The above picture shows the underneath side of a Dixie banjo ukulele. Notice the set screws on the right and left of the two screws which attach the neck.These set screws are used to adjust the angle at which the neck joins the pot. This feature, which is unique to the Dixie banjo uke, enables the distance of the strings above the frets (the action) to be adjusted without removing the neck or loosening the strings. The two other screws attach the neck to the pot. By adjusting the screws. the uke can be made to have a very easy action provided that you have deepened the slots in the nut properly (with a thin hacksaw blade.)
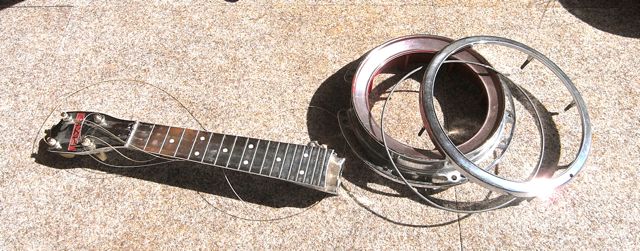
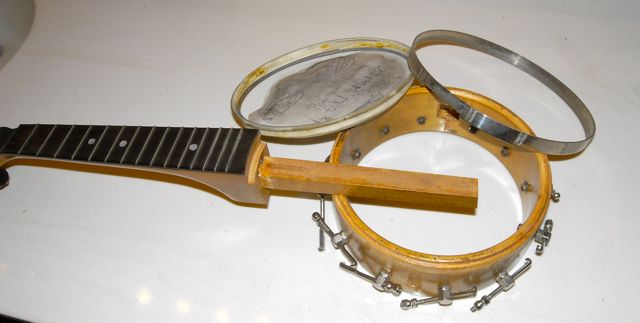
The above picture shows a Dixie banjo ukulele that has been disassembled. Banjo Uke (Banjolele): replacing the head with a new vellum. (See below for special instructions for the Dixie banjo uke.) Replacing the vellum on a banjo is not at all hard to do but the explanation of how it is done is sort of confusing. Before you fix your banjo uke with a new vellum as shown below, you should read the linked instructions from the musicroom-online which is mentioned in the paragraph above about three times. If it is not possible to repair the pot or replace the vellum on your banjo uke you may be able to use the other parts and an 8" hand drum to make a new banjo ukulele as shown on the banjo ukes page of this website. To replace the vellum, you must first disassemble the uke as shown below. Vellum can be obtained from elderly.com or on ebay.com from thinnestman. Search ebay for "banjo uke head" or "banjo head". If you are replacing a plastic headwith vellum you will have to make a flesh ring to fit around the pot to keep the vellum from coming up through the bezel ring. This ring can be made from 1/8 inch or 3/32 inch aluminum or brass welding rod obtainable from your local welding supply store. The aluminum is easier to bend than is the brass.
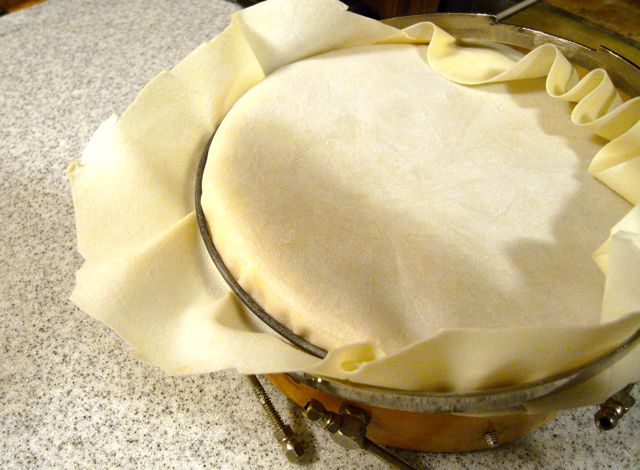
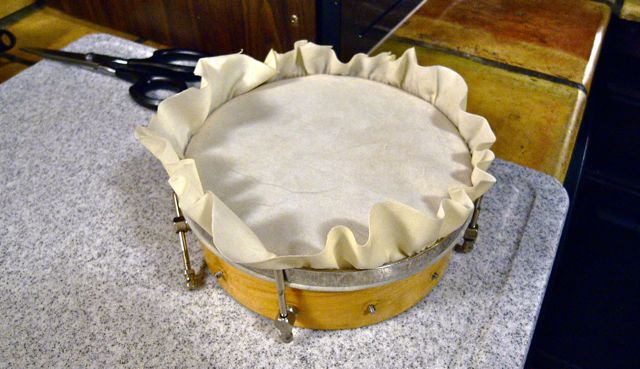
After the vellum has soaked for 15 minutes. dry it by rolling in a towel and drape it over the uke and slide the flesh ring down over the vellum and pull the edges over that ring and up inside the bezel.
After you get the flesh ring and the bezel in place. you can pull on the edge of the vellum to get the wrinkels out and tension the vellum as shown here. The vellum will become much tighter as it dries so you must have it loose at first and check it as it dries and periodically loosen the hooks the hooks on the bezel so that the vellum doesn't split. Let it dry for 24 hours. If your piece of vellum is too thick, it may be impossible to position the bezel over the vellum and the outside of the uke. If that is te case, get a thinner piece. In my experience, the calfskin vellum has more of the banjo ukulele sound you are looking for. The goatskin vellum sounds less full and too bright.
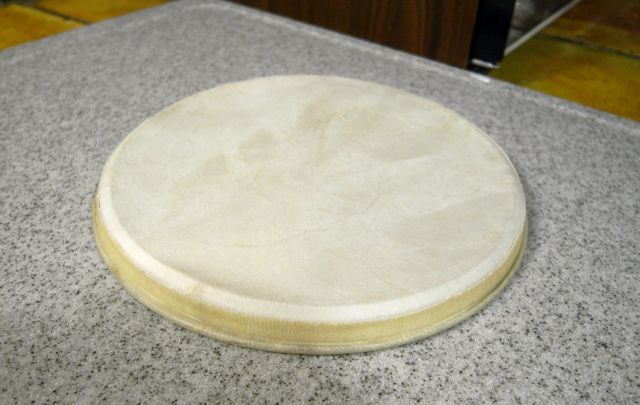
When the vellum has dried for at least 24 hours, remove it from the ukulele and trim off the excess material with fingernail scissors so that it looks like the picture below. If you are replacing the vellum on the Dixie banjo ukulele, do not disassemble it because you may not be able to fit it all back toether. Instead, use fingernait scissors to cut off the excess vellum with the uke put together. Look farther down this page for a picture of the Dixie uke with the new calfskin vellum installed.
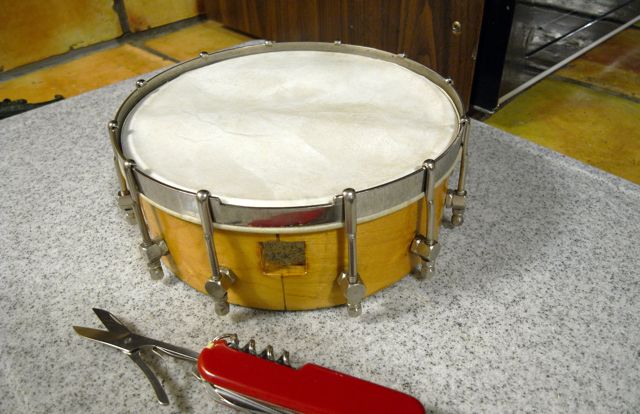
The picture below shows the banjo reassembled and before the vellum has been tightened. Notice that the notch in the bezel must be placed where the neck attaches so that the bezel does not interfere with the strings. After you reattach the neck and strings, place the bridge so that it is the same distance from the 12th fret that the 12th fret is from the nut. If you are replacing the vellum on a Dixie banjo uke, I advise leaving it bolted together and cutting the excess vellum with fingernail scissors. This is because of the small distance the flesh ring sits below the ukulele top.
Here is the banjo uke after being cleaned and reassembled with the new vellum which has not been tightened. The label says S. S. Stewart Colligian banjo ukulele, but it is the same as the Slingerland May Bell Concertone ukulele shown on the Banjo Uke section of this site (except for the trim on the fretboard). Its overall length is 21". It is very LOUD. Below is the uke after the repair was completed. For more about banjo ukuleles, go to the banjo uke page of this site.
For more instructions go to this Banjo Ukulele site. This ukulele banjo plays well and sounds excellent when strung with the Aquila Bionylon strings with the the low G string.
On the Dixie banjo uke, the edge of the vellum must be trimmed with the uke fully assembled because the tension ring is too thin to cover the edge of the vellum and the vellum will come loose if the tension ring is removed. REGLUING THE NECK
Often you find ukuleles for sale cheap because the neck has come loose. This picture shows a way to clamp the neck when you reglue it. If you want to be extra compulsive you can put in a screw after the glue dries. You should use Titebond yellow glue. Epoxy does not stick well to hardwoods. The threaded rod is 5/16 diameter. The rubber bands keep the wood block from slipping off of the heel of the neck by holding down the long end of the threaded rod. If necessary, you can tighten the strings a little to hold the front of the neck against the ukulele. The picture below shows another way to clamp the neck.
This pictures shows the a bicycle rubber inner tube used as a clamp to glue the neck to the body of a ukulele. make sure the neck is positioned so that the strings are located equal distances from the sides of the neck before you let the glue dry and make sure the strings are the proper height from the frets. The homemade clamp consisting of 5/16 inch threaded rod and blocks of a two by two adds addtional clamping pressure. UKULELE BRIDGE: How to fix and reattach:
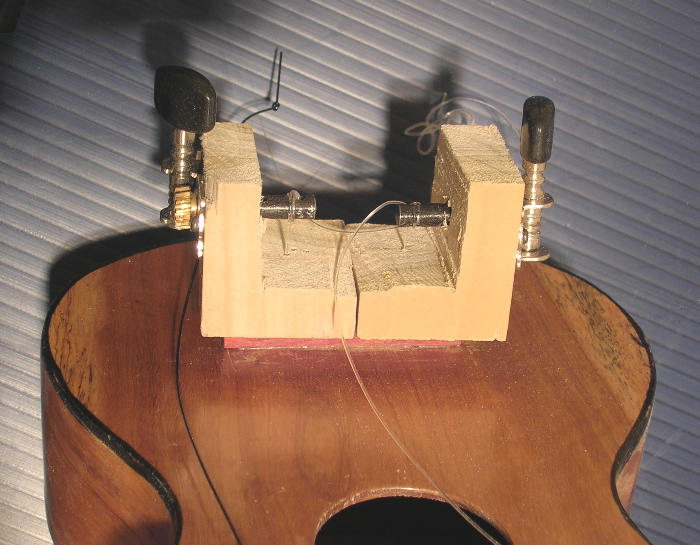
This picture shows a way of regluing the bridge on your uke even if you can't get clamps of the right size. The devices are made of wood and guitar tuners. The nylon strings are attached to buttons inside the uke. See my book for more details. See below for another method of attaching the bridge.
This picture shows another method of attaching the bridge. The screws are tiny ones used for Maarklin m-track HO gauge model railroad track. You will have to have a set of numbered drills to find the right size to drill the holes. After you have got every thing right, put Titebond glue on the bottom of the bridge, tighten it down and remove the excess glue with a damp cloth. Leave the scews in after the glue dries for extra strength. Use a drill the diameter of the head of the screw to make a shallow countersink so the top of the screw will be flush with the top of the bridge. The screws will not affect the sound of the ukulele. Leaving the screws in may prevent the bridge from popping off during a performance or in the middle of the night which might make such a loud noise that it could wake you up! A picture of this uke after the bridge was reglued is on the Vintage Ukes section of this website. If you use too small of a drill for drilling the holes for the screws you risk breaking the screws when you put them in.
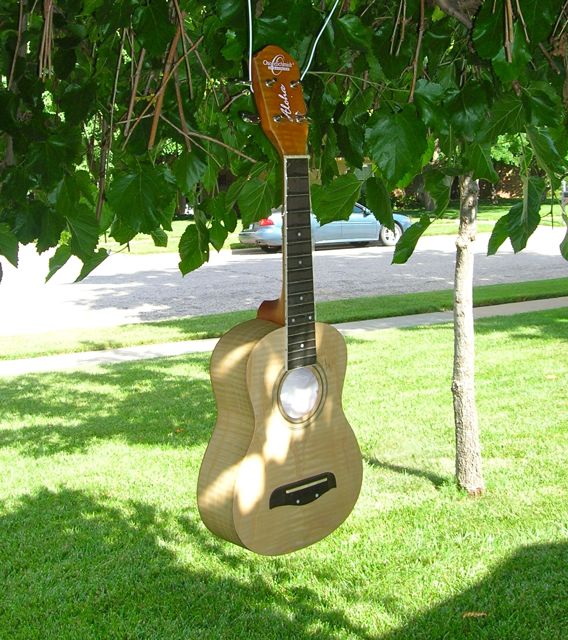
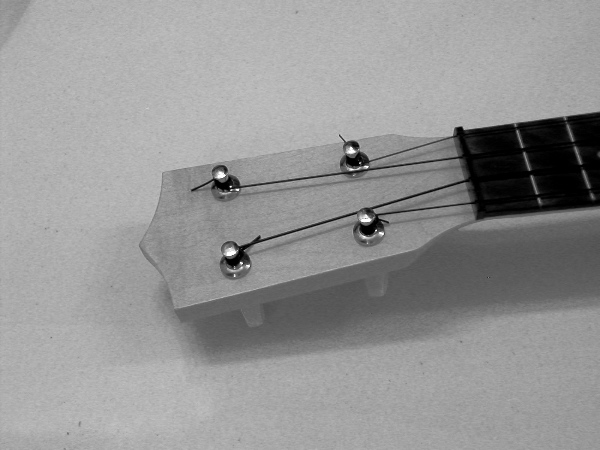
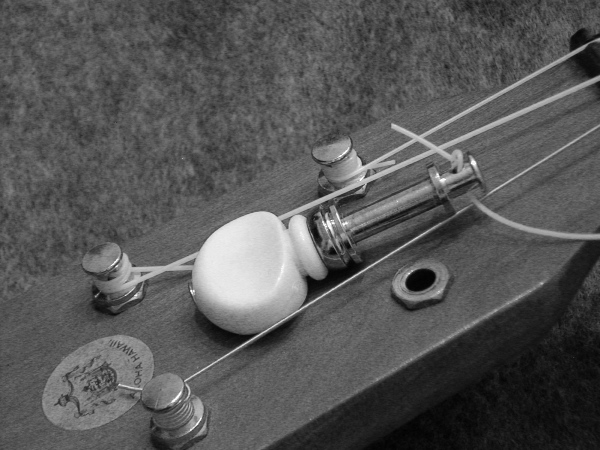
The uke pictured above is an Oscar Schmidt by Washburn OU2-L which I got on eBay from P. Hill Auctions. This one is a light-weight birch model that is louder than the more common mahogany model. The OU2 models which are inexpensive are listed as having a satin finish but could be said to be unfinished. I sprayed this one with Bulls Eye shellac obtained in a spray can from Lowe's Hardware and later gave it a slight going over with steel wool. It sounds and feels great--maybe better than it would with a lacquer finish. If you don't want shellac on the fretboard. you should cover it with masking tape. Note the ball of cotton inside the uke which prevents the shellac from getting on the label inside. See the article on this site for more details. For a lot more information on refinishing ukes see my book the UKULELE PLAYERS GUIDE. When you obtain an old ukulele,very often it will have broken or missing tuners. On the less expensive models there will be small holes through the wood that will not fit any currently made tuners.The best solution is to get the tuners off of some old broken ukulele. If you can not do this, an easy fix can be accomplished by using the Ping tuners, one of which is shown above, or Grover 2B tuners which look the same but have black buttons. These can be obtained inexpensively from Elderly Instruments.
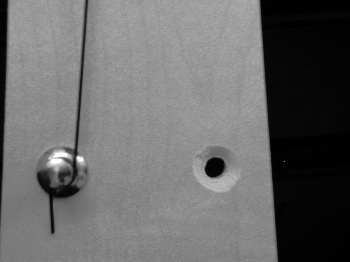
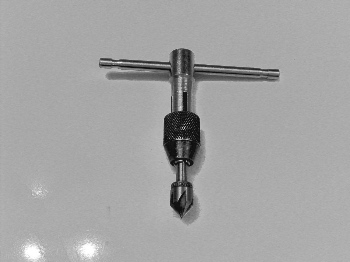
The first step is to carefully drill out the hole so that the shaft will just fit the hole. Then the top of the hole must be tapered as shown above so that the tapered part of the tuner assembly will fit in the tapered part of the hole, an operation that can be accomplished using a countersink mounted in a tapholder or drill chuck as shown below.
After you have drilled out the hole and cut the tapered indention in the top of the hole, you are ready to install the tuner which will work much better than the original one. Notice that this repair can be performed entirely with hand tools and without placing your ukulele in a vice which might damage it.
This picture shows the ukulele with the ping tuners installed. The Ping tuners work much better than most of the older ones. Of course, if your ukulele is a rare or expensive model, you should try to keep it as original as possible. A lot of the old Martin and Kamaka ukes came with tuning pegs which are similar to the Grover 4W tuners that are still available today from ukuleleworld.com and other sources. These tuners have a metal bushing that must be fitted into the headstock. If your ukulele came with these tuners, the bushing is usually still in there and all you have to do is attach the rest of the parts.
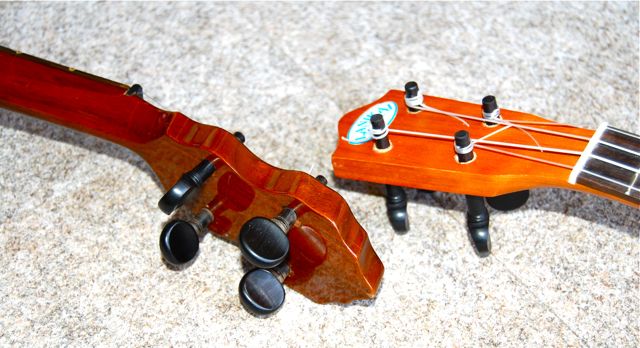
This picture shows the bushing that was part of the old Grover 4W tuners with a new Grover tuning peg that fits into it. If your ukulele has the bushing, all you have to do is put in the rest off the parts and you are ready to play. If the bushiing is not there, you may be able to press in the new bushings without modifying the hole. If this is not the case, you better head for the repair shop or find parts that fit. If your ukulele has larger size holes where the tuners have been removed you may be able to use tapered violin tuning pegs which come in four sizes. You can go to a local violin repairman to try the various sizes. If you can't get the exact size you can wrap thin cardboard around the pegs to make them fit. Even though the pegs are tapered the holes do not need to be. After you get the pegs to fit you will have to use a hand drill to drill tiny holes through the pegs for the strings.. If the pegs stick through too far you can cut a little off the small end off with a hacksaw. The picture below shows a ukulele and a banjo that have been fixed this way. The holes were left as they were and not drilled or tapered.
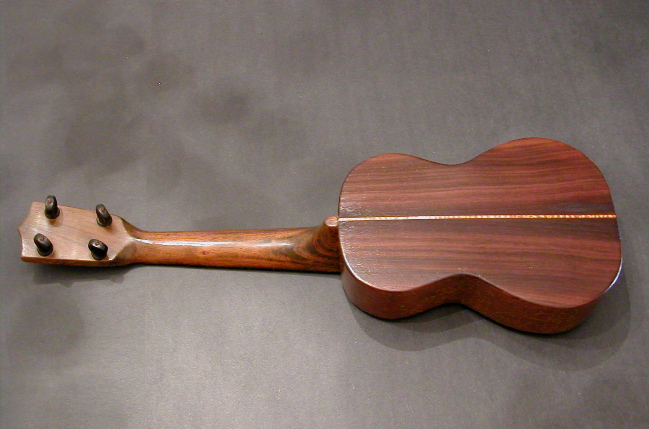
This ukulele was described as having a back made out of rosewood. It wasn't until I started hanging around the instrument-repair department that I was able to explain how this happened. The instrument repairmen acquire all kinds of severely damaged instruments and use parts of them to fix the others. In this case the back probably came from a classical guitar. The rest of the body of the instrument is of old fashioned mahogany. Except for the back, the instrument, which has no brand name, seems completely original. The tuning pegs are very old but are not cracked. I was unable to tighten them sufficiently until I took out the screws and applied oil to the threads, after which all was well. As you might imagine, this instrument has a superior tone and is quite loud which probably was the reason so much effort was made to repair it. As is the case with a lot of the very old ukuleles, this one has a narrow neck, which makes it more difficult to play. See the Vintage Ukes section of this website for more repair tips. |
||
|
next
|
|
home |
||

